Notice: Undefined index: group in /opt/lampp/htdocs/pages/navigation.php on line 5
Notice: Undefined index: user in /opt/lampp/htdocs/pages/navigation.php on line 171
Help: Bus Management
This interface will allow the user to manage the biometrics units assigned to the schools on the Track-Mi website
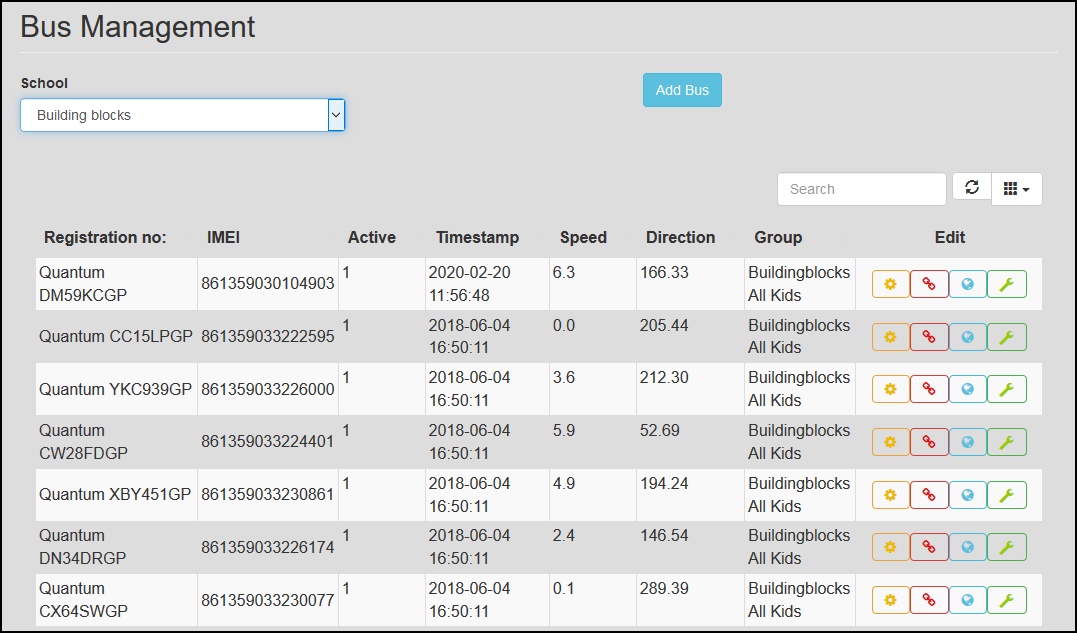
- The main interface displays all the biometrics units registered on the selected school. The main grid displays the
vehicle registration number, GSM Module IMEI number, active status, last activity timestamp, last recoded
speed, last recoded direction and the active fingerprint group. It also displays four action buttons
in the row next to each biometrics unit. At the left above the main grid is the "School"
drop-down list. The user can select the desired school to work on from this drop-down list. The user can
only access schools that he/she has access too, given by the system administrator. Once a different school
has been selected, the main grid will update with the biometrics units assigned to that school. In the middle
above the main grid, is a blue "Add Bus" button. This button allow the user to add a new
biometrics unit to the selected school.

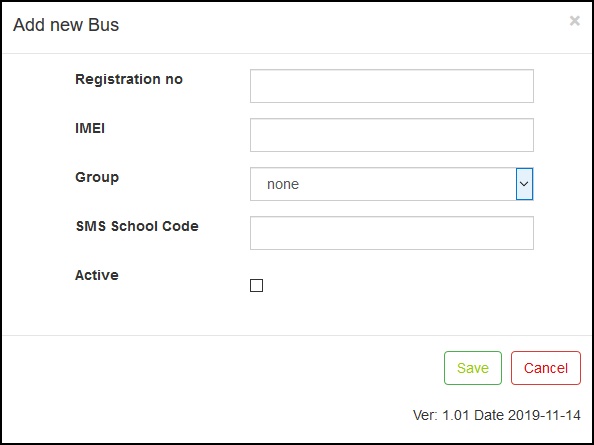
- Clicking on the "Add Bus" button, will open the "Add new Bus" form. The user can create
a new biometrics unit by filling in the correct data in each field on the form. Please note that the "IMEI"
field must be the IMEI number of the GSM module inside the biometrics unit.To save the new biometrics unit, click
on the "Save" button or click on the "Cancel" button to exit the form without saving the
new student account.

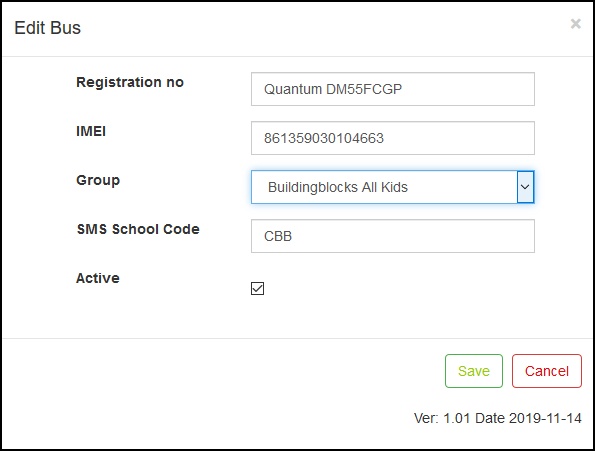
- Next to each biometrics unit on the main form is an orange "Edit" button. Clicking on the "Edit" button
will open the "Edit Bus" form. This form is similar to the "Add new Bus" form. The user
can edit an existing biometrics unit by changing the data in the edit fields. After creating a new biometrics
unit, the user can edit the new unit to assign a fingerprint group to the new biometrics unit. Clicking on the
"Save" button will save the changes, but clicking on the "Cancel" button will discard any changes made.

- Next to each biometrics unit on the main form is an red "Re-Upload group to bus" button. Clicking on
this button will generate a list of all the students assigned to the currently selected fingerprint group and
set a flag on the server to notify the biometrics unit to download a new student list, next time it connects
to the server.
- Next to each biometrics unit on the main form is a blue "Last known location" button. Clicking on
this button will open a new tab in the browser and open a URL pointing to Google Maps with an embedded GPS position
where the biometrics unit last recorded its own position. The user can use this feature to track the bus. The
biometrics unit will update it's last known position every minute while it is traveling.
- Next to each biometrics unit on the main form is a green "Update Hardware Settings" button. Clicking on
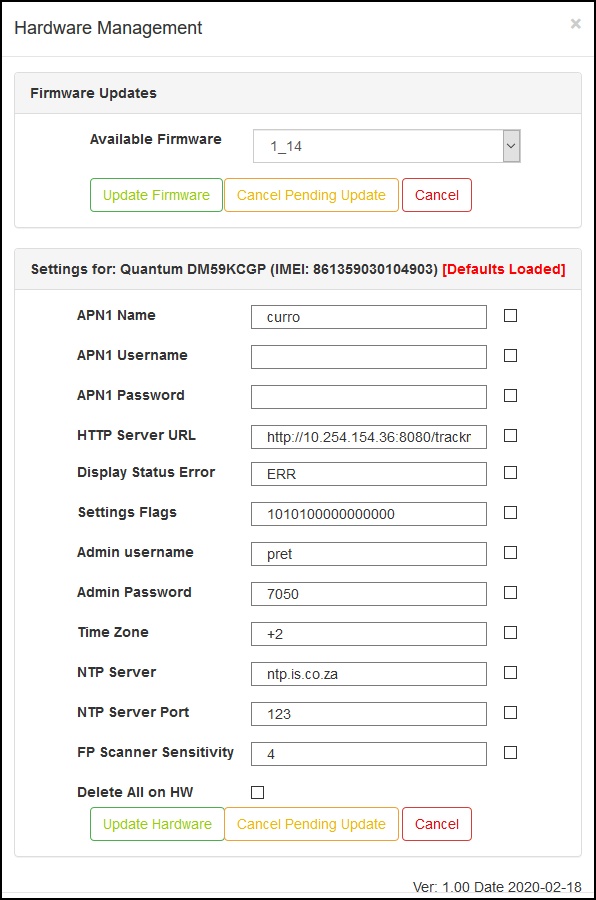
this button will open the "Hardware Management" form. Please note the "Update Hardware Settings"
button is only available when the current user is an administrator. The "Hardware Management" form allow
the administrator to do firmware upgrades as well as changing settings on the biometrics units. For a firmware
upgrade, the administrator can select a firmware version from the "Available Firmware" drop-down list,
then click on the "Update Firmware" button to start the firmware update. Once the biometric unit
connects to the server, it will be notified of the pending firmware update. The biometrics unit will only
do the firmware update once it is in low power mode. The administrator can cancel a pending firmware update
by clicking on the "Cancel Pending Update" button. This action will only work if the biometrics unit
have not received the pending update notification. If the administrator click on the "Cancel" button the
form will close without making any changes.
The administrator can change settings on the biometrics units by changing the settings in the settings fields. Each field will allow the administrator to change one setting. Next to each setting field is an unnamed checkbox. The administrator will have to click on the checkbox so that it contains a check mark, to select that setting for update. Once the administrator has made all the changes to the settings he/she wants to make, he/she will have to click on the "Update Hardware" button to trigger the settings update. The system will then generate a file with all the selected settings and set a flag to notify the biometrics unit of a pending settings update. Once the biometric unit connects to the server, it will be notified of the pending settings update. It will then download the file with all the settings and reconfigure itself according to the new settings. At the bottom of the settings list, is a checkbox named "Delete All on HW". If the administrator selects this option, all the settings will be updated on the biometrics unit. The administrator can cancel a pending settings update by clicking on the "Cancel Pending Update" button, before the biometrics unit connects to the server. Or the administrator can click on the "Cancel" button to exit the form without making any changes.
