Notice: Undefined index: group in /opt/lampp/htdocs/pages/navigation.php on line 5
Notice: Undefined index: user in /opt/lampp/htdocs/pages/navigation.php on line 171
Help: Fingerprint Assignment
This interface will allow the user to manage the groups of students assigned to each biometrics unit
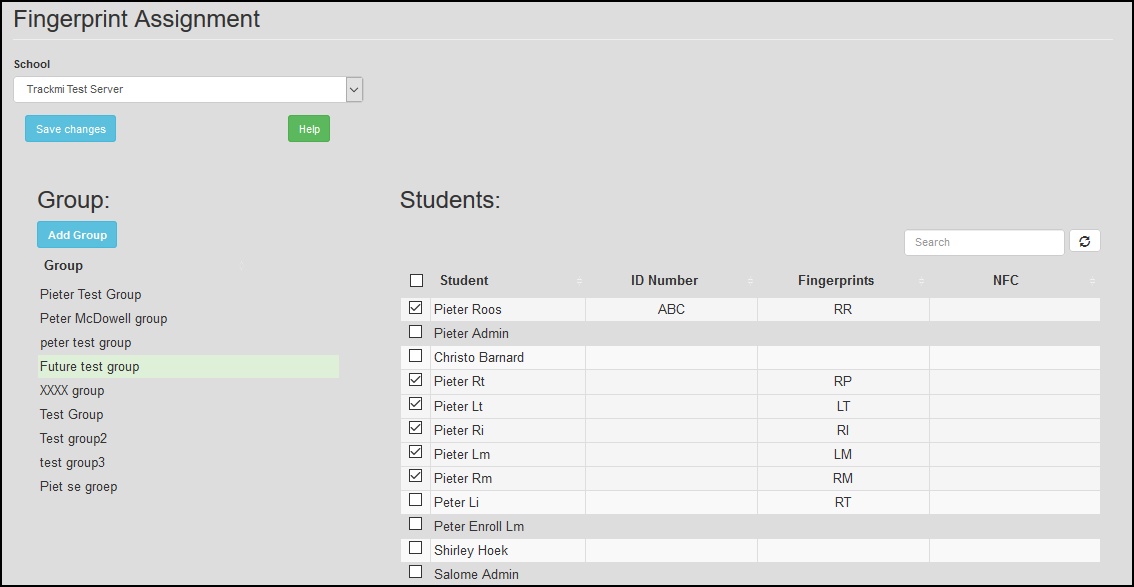
- The main interface displays two grids. The grid on the left displays all the groups created for the selected
school. The grid on the right displays all the students, fingerprints and selections for the group selected
in the "Group" grid. Above the grids in the top left corner of the main interface is the "School"
drop-down list. The user can select the desired school to work on from this drop-down list. The user can
only access schools that he/she has access too, given by the system administrator. Once a different school
has been selected, the "Group" grid will update with the groups assigned to the selected school.
By selecting a group in the "Group" grid, the "Students" grid will update with all the
students in the selected school and the check boxes next to each student in the grid will indicate if
the student is part of the group or not. A check mark in the checkbox indicate that the student is
part of the group. The user can now add or remove students from the group by clicking on the checkbox
next to each student in the grid. Once the user has completed his/her selection, the user can click
on the "Save changes" button above the grids on the main interface. The system will then update
the selected group with the changes made by the user.

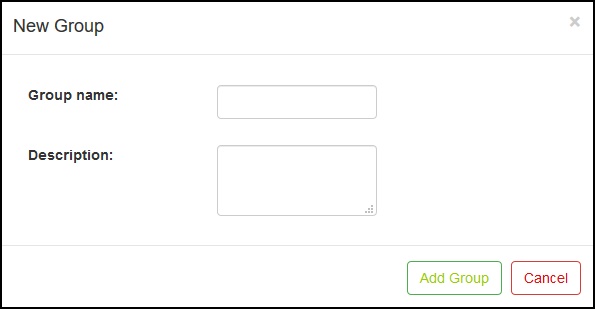
- Clicking on the "Add Group" button above the "Group" grid, will open the "New Group" form.
The user can create a new fingerprint group by filling in the correct data in each field on the form.
To save the new fingerprint group, click
on the "Add Group" button or click on the "Cancel" button to exit the form without saving the
new fingerprint group.
